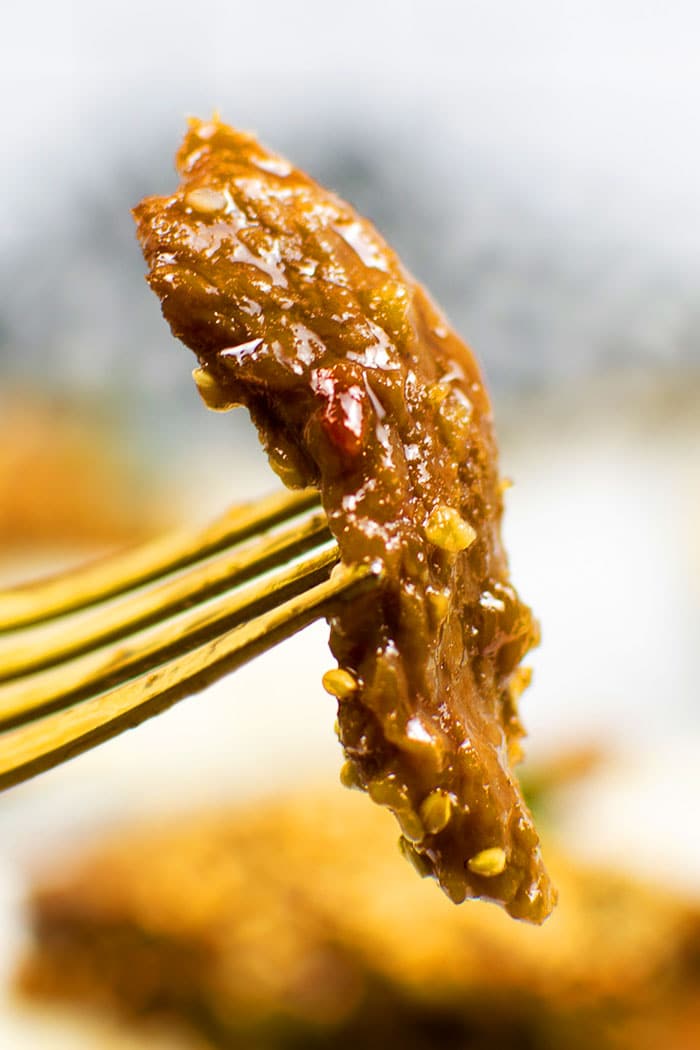
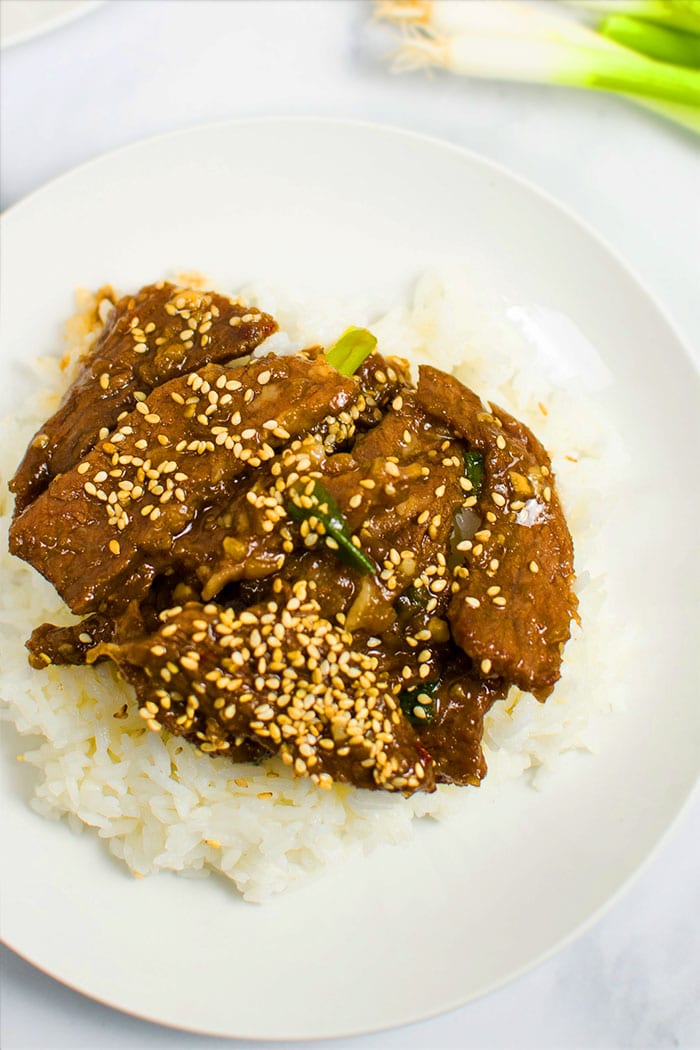
Quick and easy instant pot Mongolian beef recipe, homemade with simple ingredients in 30 minutes. Tender beef slices are coated in a sweet soy ginger garlic sauce.
This is one of my favorite take-out dishes! This recipe is so simple that you will no longer have a need to order out. The flavor is sweet and savory, and the pressure cooker makes the beef perfectly tender with such minimal effort. Create your own Asian feast by trying my Szechuan Chicken (One Pot) and Chinese Bourbon Chicken (One Pot) .
Want to Save This Recipe?
Enter your email & I'll send it to your inbox. Plus, get great new recipes from me every week!
By submitting this form, you consent to receive emails from One Pot Recipes
How to Make Mongolian Beef From Scratch In The Instant Pot
- Heat oil- On the "Saute" mode.
- Saute ingredients- This includes onion, garlic, ginger.
- Add remaining ingredients- This includes beef, soy sauce, water, brown sugar, hoisin sauce, red chili flakes.
- Mix- Until combined.
- Cover and cook- On the “Meat/Stew” mode or "High Pressure" mode.
- Release pressure- Naturally.
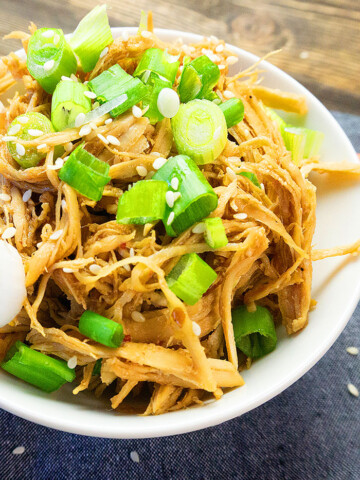
- Open lid- And mix in green onions.
- Enjoy- Garnish with sesame seeds and dig in!
Mongolian Sauce/Mongolian Marinade
Combine the following ingredients until smooth:
- ½ cup soy sauce
- ½ cup water
- ½ cup brown sugar
- ½ cup Hoisin sauce
- ½ tsp. red chili flakes
- 1 teaspoon fresh grated ginger
- 2 cloves garlic minced
Store it in a sealed jar in the refrigerator for up to 1 week to make dinner time easy.
What's the difference between Mongolian Beef and Szechuan Beef?
Mongolian beef tends to be a little less spicy than Szechuan beef. The Mongolian version also typically uses Hoisin sauce as an ingredient in addition to soy sauce and brown sugar.
What Sides to Serve with Spicy Mongolian Beef Stir Fry Recipe?
Rice is always a great option that people love. Try any of these:
- Coconut Rice (One Pot)
- Garlic Rice (One Pot)
- Vegetable Fried Rice (One Pot)
- Chicken Fried Rice (One Pot)
- Bacon Fried Rice (One Pot)
- Cauliflower Fried Rice (One Pot)- Healthier alternative to regular rice.
- Plain boiled rice- jasmine rice is a great choice.
Vegetables will also pair perfectly like these:
I believe soups always complete a meal and these are all delicious choices:
Noodles are a super popular side, especially these:
- Thai Peanut Noodles (One Pot)
- Sesame Noodles (One Pot)
- Boiled noodles- Plain and simple egg noodles are best.
Storage
Refrigerate- In a sealed container for up to 2 days.
Freeze- In a sealed container for up to 1 month.
Reheat- Thaw, if frozen, and reheat in the microwave or on the stovetop.
Variations
Add noodles- Such as rice noodles, ramen, or egg noodles. Boil and drain them separately and mix them wit the beef and sauce at the end.
Add vegetables- Such as broccoli, onions, bell peppers, sugar snap peas, zucchini, baby corn, or bok choy.
Adjust the spice- Add more or less red chili flakes depending on you preference. You can also omit it entirely, if you can't handle spice.
Add nuts- Such as roasted cashews or peanuts.
Make it gluten-free- Simply use coconut aminos in place of the soy sauce, or use gluten-free soy sauce or tamari sauce.
Make it a salad- Serve the beef over your favorite greens such as spinach, romaine, or in a lettuce wrap with butter lettuce.
Adjust the amount of sauce- Double all the sauce ingredients to make a very saucy beef.
Make it a soup- Mix in 1-2 cups boiled ramen noodles and more broth (per your desired consistency) at the end to make a very filling meal.
Make it healthier- Use honey or molasses instead of brown sugar. Obviously the flavor will change slightly, based on your sweetener choice.
Tips And Techniques
How to thicken sauce? Mix in a small amount of cornstarch slurry. I did not think it was necessary for this recipe. You can also let it cook uncovered on the "Saute" mode until excess liquid is reduced and evaporated.
Make sauce thinner? Simply mix in more water or broth.
What type of beef to use? I used thinly sliced flank steak, but you can also use top round beef, sirloin, skirt steak, or even New York strip.
Use low sodium soy sauce- To prevent the dish from becoming too salty.
Don't replace the brown sugar with granulated sugar- Because brown sugar has a deeper, richer more caramelized flavor.
Make sure to allow the Instant Pot to release the pressure naturally- This allows the beef to continue cooking and becomes even more tender.
Use fresh onion, ginger, and garlic as opposed to powders- Fresh always provides the best and most vibrant flavors.
More One Pot Chinese/ Asian Dinner Recipes
- Chicken Pad Thai (One Pot)
- Crockpot Sesame Chicken
- Crockpot Orange Chicken
- Sweet and Spicy Chicken (One Pot)
- Honey Sesame Chicken (One Pot)
- Black Pepper Chicken (One Pot)
- Cashew Chicken (One Pot)
- Slow Cooker Beef and Broccoli Recipe
Recipe

Instant Pot Mongolian Beef
Want to Save This Recipe?
Enter your email & I'll send it to your inbox. Plus, get great new recipes from me every week!
By submitting this form, you consent to receive emails from One Pot Recipes
Ingredients
- 1 tablespoon Oil
- ⅓ cup Onion Finely chopped
- 2 cloves Garlic Finely minced
- 1 teaspoon Ginger Freshly grated
- 1.5 pounds Beef Thinly sliced, I used flank steak but you can also use flank steak or top round beef, sirloin, skirt steak, or even New York strip
- ½ cup Soy sauce Low sodium
- ½ cup Water Low sodium
- ½ cup Brown sugar
- ½ cup Hoisin sauce
- ½ teaspoon Red chili flakes
- ½ cup Green onions Chopped
- 1 teaspoon Sesame seeds For garnish
Instructions
- Turn Instant Pot to “Saute”mode and heat oil.
- Add onion, garlic, ginger and saute for 2-3 minutes until garlic and ginger are fragrant.
- Add beef, soy sauce, water, brown sugar, hoisin sauce, red chili flakes and mix everything together.
- Put the lid on and turn up the the valve to “Sealing.” Select “Meat/Stew” mode or "High Pressure" mode and set the timer for 10 minutes.
- When the cook time is over, let the pressure release naturally.
- Then, open lid and mix in green onions.
- Garnish with sesame seeds and enjoy!
Notes
- Read all my tips above.
- Leftovers can be stored in a sealed container in the fridge for up to 2 days and reheated in the microwave.
Nutrition
An automated tool is used to calculate the nutritional information. As such, I cannot guarantee the accuracy of the nutritional information provided for any recipe on this site.

Leave a Reply